Showing posts sorted by relevance for query spring. Sort by date Show all posts

Thursday, March 22, 2018

Spring Time Round-Up


It is finally Spring!  Spring is a wonderful time of year, birds are chirping, flowers are starting to loom, and days are getting longer and warmer.  It's almost like a new beginning.  In fact, in some cultures, the Spring Equinox is considered the New Year!  This post is a round up of all the spring related posts to offer them in all one place!

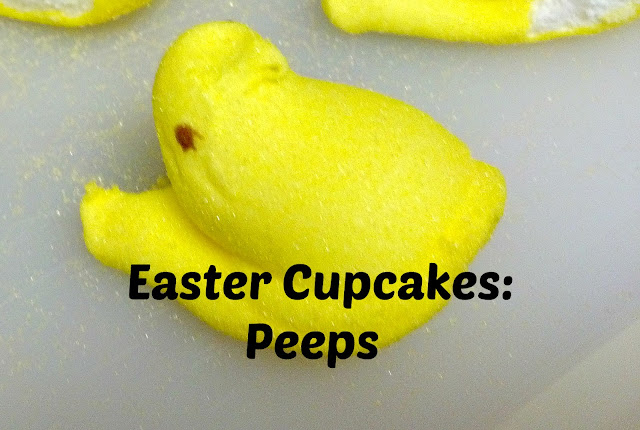
The first holiday we celebrate in Springtime is Easter! Use one of these unique treats to make your Easter dessert extra special! 


 l

Flowers are starting to bloom, indoor and outdoor.  Take a peek at these posts for tips on how to help African Violets to re-bloom and start your seeds indoors before summer arrives.

Want to create a fun cupcake for any spring related activity?  Garden Party anyone?  Check out these Flower Pot Cupcakes!


April showers bring May flowers, but they also cancel outdoor events.  Check out my thoughts on rain dates!

Do you have any Springtime topics you’d like me to review?  Would you like more Springtime treats to make?  What’s your favorite thing about Spring?

Thursday, February 28, 2019

Spring Cleaning Plan: Declutter with Classy Event Organizer - *Free Printable*


Happy Last day of February everyone!  Tomorrow starts a new month, and we only have two and a half more weeks until Spring!  I don’t know about you, but I feel like Spring-time is a clean slate, sometimes more than the New Year, because the days are longer, all the bright colors are motivating, and everything is starting to grow, making a fresh start!   

Something that I usually do in spring is clean, everything from washing windows to wiping down all the baseboards in the house.  I’m sure you’ve heard of “Spring cleaning” before!  Along with the regular “cleaning” part of Spring Cleaning, I usually do my annual decluttering during this time as well.  This year however, I decided to take a different approach.  I’ve done the whole “15 minutes a day” cleaning, room by room cleaning, three boxes: keep, toss and trash approach, but still nothing really “sticks”.  I always end up with the same items being dusted off and put right back to where they were hiding.  I’ve bought organizing baskets, made my own containers, etc to store all the stuff I’m keeping, however my house has always felt cluttered, even after I’ve decluttered! 

Now I’m not a huge fan of the minimalist look, I like to see my stuff, and I like the memories they bring when I pass by a tray that holds my jewelry that my sister gave to me for my birthday, or the pink bowl holding bottle caps that my grandmother passed down to me.  These items bring me joy, but sometimes that joy is over shadowed by the not so joyful feeling of clutter.

I did listen to two audiobooks (thank you hoopla) in the last two months that I feel have significantly helped me deal with my clutter.  (Side note, if you have never tried to listen to an audiobook, I suggest you try!  While driving, while doing laundry, or washing the dishes.  It like multi tasking to the max!)  The first book I listened to was “The Life Changing Magic of Tidying up” by Marie Kondo (which I listened to before I even knew she had a show on Netflix).  The second book was “Grace, Not Perfection” by Emily Ley, the owner of the Simplified Planner.  Although these books are completely differently, one of the points that both of these books had regarding “decluttering” was to not feel guilty about getting rid of something.  Thank it, and just LET IT GO!

The Theory:
Now, for those of you who know Marie Kondo’s method (Konmari), in my opinion, the theory of picking each item up and asking yourself if it brings you joy seems a little corny.  My friend and I joke about this anytime we pick anything up now.  Even the handy dandy Husband will pick up my cat and ask if we can get rid of her because she doesn’t bring him joy (yes, so funny).  But this theory of sparking joy is something that I think a lot of us are missing as we live amount our mountains of possessions.  Emily Ley’s theory was to simplify life, only keep the best, the favorite and the necessary.  Seems rather similar in theory and very simple.  I decided to try a mix of the two “decluttering” methods from these books and see how I did.

Both of these books were also similar in the fact that they both gave “permission” to let things go.  Don’t feel guilty that you don’t use an item anymore.  For example, I’ve had half of my closet full of beautiful dresses, skirts, suits, clothes, etc. that don’t fit because they are too small.  Some of them I’ve had for 10 years or so.  Each year I did my spring cleaning, I kept these items because “one day” I’ll fit back into them, or I felt guilty because they were rather expensive when I bought them.  (Please tell me I’m not the only one with this problem!)  These items no longer sparked joy.  They sparked guilt and sadness that I was no longer that smaller size.  When I gave myself permission to get rid of anything that didn’t spark “joy” or make my happy I was able to open up my closet and find clothes I had forgotten about.  I kept two of my very favorite dresses that were still a bit small, but I just enjoy looking at them, the rest of them were I the “get rid of pile”.  It is so freeing to be able to let go of these items and not feel guilt.     

The De-Cluttering Plan:
The KonMari method is about going through your possession in category, not by room and I understand this theory as she explains it in her book, however I already know that I’m not going to store my novels with my cookbooks or vice versa.  I like my cook books in the kitchen. And I like my novels stored in my library shelves.  So, I decided to use the Emily Ley theory of going room by room and mix it up with the KonMari method of sorting category by category.  This way will also keep my messes of pulling everything out blocked off to one room and not the whole house as this process can take several months. 

So here’s was my plan, and how I decided to organize myself. 

By using each “room” in my house as a first category, I made a list of what sub categories I store in that room.  I decide to start this de-cluttering in a room that we call my “closet” room.  It is a guest room that houses my clothes, shoes, hand bags, make up, etc.  I thought this would be the best room to start as it wouldn’t disrupt normal everyday life and it was clothing was the first and seemed like easiest category in Mari Kondo’s book. 

I made a checklist (see below for printable) and started to go through all of my clothes.  I first started with tops, so I pulled out all of my tops (folded/hanging, tshirts/sweaters, old/new, etc.) and placed them on my bed.  I went through each item, picked it up and decided if it “sparked joy”.  Some items were easy!  However, some items were hard.  I through those items into a pile to go through last.  By the time I got to those last few items, I was prepared to make a final decision. 

I then continued through my list and parred down my clothes to about half (okay, maybe like 60%). I ended up with so much space left in my closet which I thought would make it feel barren and sad, but it actually felt freeing.  After the first day of my decluttering, I tackled two “sub categories” and I could actually see what was in my closet the next morning.  Trying to find an outfit was “easy”!  WHAT?!  And even more exciting, I found a pair of new sweatpants with the tags still on them that I totally forgot that I purchased months ago.  I’m wearing them as I type this, and they are so soft and warm.  The ease of getting ready in the morning was such a great feeling that I couldn’t wait to get back to my decluttering that evening.  Also, I have now ingrained in my brain that I never want so many items in this space that I won’t over-buy, or keep items due to guilt again.    

After going through several “sub categories” I found myself with a very large pile, (about 4 trash bags) of clothes.  I found an app called “Poshmark” where you can sell (and buy) almost anything, but the sales are usually geared towards brand name clothes and accessories.  I decided to take a few pictures and see if I could sell these items.  I had no idea what I was doing, but I posted a few items that were brand named and actually made some sales!  I turned those clothes that were sparking negative joy into some moola!  Poshmark is like having a garage sale 24/7, and you don’t have to try and make change for anyone or deal with those pesky neighbors who just want to see what you have to sell (please tell me you know what I’m talking about here).  Never heard of Poshmark, but want to try it out?  Just use my code “JSandlin10” to sign up and get $5 just for joining!  For full disclosure, I’ll get $5 if you make a first purchase!

I’m almost done with decluttering my closet room, and it feels fantastic!  My next task will be the room I am usually in the most during the week which is my kitchen.  I will tackle each category as I did before one at a time and viciously keep or get rid of each item.  I am actually rather excited to see what comes out of that category! 

You might be wondering how you keep from creating this same decluttering issue in the future, well I have a solution, my friend.  For example, each time I fold and put away my clothes, I take an extra second (it only takes one or two) to check over my clothes and ask myself if the item still “sparks joy”.  This mental process each and every time I go through my laundry will keep me from having to spend days and weeks going through my closet and having to do an annual decluttering each year.

The Checklist:
To help me stay organized and on track I made my own checklist to put in my planner so I can cross off each item when it is complete.  Oh the sweet, sweet, feeling of crossing something off a to do list.  I wanted to share this checklist as a printable freebie to give you some inspiration to join me in this decluttering journey once and for all!  


Check out my printable (full page of A5 planner size) and print it as is or as inspiration to create your own and share it on my Facebook page!  I would love to see what you are using to declutter and spring clean this season!


Sunday, February 18, 2018

DIY: Bulb Vase


I love making homemade gifts for no reason at all!  You don’t have to wait for a holiday to celebrate the everyday!  When I told you about accidently “forcing” my tulip bulbs, I took the opportunity to share the touch of spring with family.  Finding single bulb vases can be tricky if they aren’t in season, so I decided to make my own.  

I took a few items from around my house to make bulb vases and wanted to share to hopefully spark some spring time creativity of your own!   


For a single bulb vase, I needed something that was transparent in order to see the bulb grow, as well as hold enough water for roots to grow, but not so much that the bulb would root.


While looking in my craft room stash of containers, I found a Nacho Cheese Container (cleaned of course) to use as a bulb vase.  In order to sit the bulb above a water line, I decided to use vase filler stones.


I’m so excited to share these with my friends and I can’t wait to see what they look like when they bloom!


For updates on this DIY project, as well as other updates, follow Classy Event Organizer on Facebook and Instagram!


Thursday, March 14, 2019

The Steps to a More Perfect Container Garden


Last year I showed you how I started my seedlings indoors.  My process worked, but as I have been upgrading my container garden, I decided a needed I a little bit more preparation this year in order to have a smoother spring/summer.  Usually I plant seedlings and put those seedlings into pots when they are big enough to go outside, however I never really thought through the space or number of pots that I had on hand.  So, I ended up putting a plant in either too small or too big of a pot, not having enough tomato cages, or not having the space to put them altogether.  This year, I decided to decide what my garden is going to look like BEFORE I start my seedlings so that I don’t waste time or effort later when it comes time to put them outside.

Last spring, the Mr. Fix-it husband upgraded my watering system from hoses and 360 degree sprayers that mostly just got the ground wet, to a fantastic built in piping system that allows me to have rows of container plants on my deck!  This is perfect because from where our kitchen is, I get to look out at my garden each day, as well as have easy access to the veggies for a fresh salsa or salad.  Below is a picture of what my “garden” ended up being organized last year:


I really enjoyed this set up last year, so I decided I wanted to do the same thing this year.  But first, I had to decide what I want to grow.  I had a few plants last year that I still have in the freezer that I don’t need anymore of (lookin’ at you jalapeno pepper plant) and some new ones I wanted to try. 


I started this process by writing down a list of the plants I knew I wanted to grow (tomatoes, bell peppers, eggplant, and herbs), then looked through my seedbox to find the seeds I already had on hand, and then looked through several seed catalogs to find new plants that I hadn’t grown before.  This process took most of January.  I took my time with this process because, everything was frozen and I really enjoyed looking at all the plant catalogs!  This process shouldn’t be rushed, and I wanted to take  to think about what I wanted to harvest in the future. 


Part of the process of looking at my own seeds included building my own seed storage box.  While searching for my seeds, I realized I had them stashed in all sorts of places and I wanted one container to call my seed box.  I shopped in catalogs as well as online for a box that I liked, but I couldn’t find anything in the shape or price range I wanted, so I decided to use my new wood working hobby to make my own.  (Let me know in the comments if you’d like to see the process in a post!)


After I had settled on a list of plants and purchased seeds for the items I didn’t already own, I decided to stay organized and write this information down.  (I know, sounds simple, right?)  I have not been very good at keeping a garden journal so I don’t have a good sense of what time of year we normally have our last real frost.  There are several websites with rules of thumb, so I decided to use that date until I had a better understanding from my “future” garden journals.  My area’s average last frost date is April 15th.  This date is important because most seed packets reference a “start you seeds” date based on the last frost for the year.  I made a list of each item, how many weeks before or after the frost date they should be planted and made an excel formula to tell me when I need to start the seeds (yes, I’m an excel nerd).  Now I know exactly when to start the seeds for each item instead of looking at each of the seed packets each weekend and doing to math to decide if I need to start some or not. 


Once I had the seedling start date, I needed to decide how many seedlings to start!  In order to do that, I need to know how many mature plants I want.  I started to list in my same spreadsheet the quantity of mature plants.  This would be another helpful piece of information to keep in a garden journal, for example, do four tomato plants produce the quantity of tomatoes I need, or should I plant five to keep up?  Or were eight eggplants too much for one year and I should cut back to six the next, etc.  I had to guess this year based on what I remember from last year and picked out how many I wanted of each.  I then categorized each item by what type of pot they would go into, and used a count formula to add up the quantity of each type of pot.  This way, I already know many of each kind of pot I need.  Lucky for me, I have twenty of my five gallon vegetable pots and I want exactly twenty vegetable plants (don’t you just love it when a plan comes together)?


Here is an idea of the pots that I use:
  • Vegetable Pots:  mix of different five gallon pots are the perfect size for one plant (tomatoes, bell peppers, eggplants, etc).
  • Small Pots:  mix of one to two gallon pots for smaller herb or lettuce plants
  • Rectangular Pots:  foot long rectangular plants for onions (see post here).
  • Trough:  very large 150 gallon trough on sale that I am going to try and use for large crops, and perhaps potatoes in the future
  • Grill:  an old grill that I converted into a planter which is the perfect standing height for a planter and works well for small herb plants like basil, rosemary, and cilantro.     
  • Decorative:  pretty pots I have collected over the years that I use for flowers


Once I had my full list of plants, quantities, and pots, I decided to map out how the container garden would look, much like my 2018 view.  This is really helpful because, now I don’t have to think about where I’m going to put each plant when it comes time to place them outside in a couple of months!  I already did all the work!


Now to get started on those seedlings!

How do you decide what to plant?  Do you keep a garden journal?  I want to know!

Friday, August 19, 2011

Outdoor Entertaining: Part 1

With Labor Day around the corner, I consider this the BEST time of year to host an outdoor party!  Why you might ask?  (Or even if you didn’t, I’m going to tell you).  Because where I live, Winter is just TOO cold, Summer is TOO hot and humid, and Spring time is just TOO rainy!  The end of summer/early fall time of year has just perfect weather.  Nice days, cool nights, the trees are full of leaves and some are starting to change color.  Its the best combination for outside entertaining.  

Opening up a party to the “great outdoors” gives a fabulous (and hardly used) area to decorate that you can’t usually do anything with any other time of year.  However, one bad thing about an outdoor event is the fact that Mother Nature invites herself!  I have come across a few major “mother nature” issues such as bugs (eww!), unwanted weather elements (such as large gusts of wind), and lack of light after the sun goes down.    

I have figured out a few (classy and very budget friendly) ways to help overcome these outdoor entertaining issues, but unfortunately they are too long for just one post (so here goes my first three part-er)!    

First and probably the toughest of the three , how to keep the party from ending when the sun goes down.  Unfortunately you can’t turn the sun back on once it’s over the horizon (wouldn’t that be cool), but there are a few creative ways to bring light outside, without too many wires or open flames!

1.  Strands of Christmas Lights:  I wouldn’t recommend the multi-colored lights, but stringing white Christmas lights around an awning, tent, or table is a great way to get light with stuff you already have round the house!  If you use LED lights, they don’t get as hot nor attract bugs.     

2.  Battery Operated Flameless Candles:  I LOVE flameless candles because inside or out, they look real, but I don’t have worry about burning my house down!  If you don’t already own these (you can get them at Target for about $10), and trust me, you will use them from centerpieces to holiday decor, to intimate lighting (I use them for decoration in my living room). They area perfect addition to an outside part because there are no flames and no wires to worry about.  You just turn them on and they light up!

3.  Solar Powered Lights:  This would be the most expensive option if you don’t already own them.  I did find a set of six solar powered path lights for only $24 at KMart, but you can only use them outside and they don’t offer a lot of light.  These lights are great though because you don’t have to change any batteries or plug them in!


Roam around your house for a minute and think of all the things you can use as lighting for your outdoor event!  Share what you find!

Tuesday, May 29, 2012

DIY Pretzel Bites


I love these little bites!  They a perfect for all seasons… summer, fall, winter, and spring!  I especially like these little treats in the summer because they have chocolate (an all time favorite) and are a refreshing mix between salty and sweet.  I’m sure you have seen these yummy treats all over the internet, but I put a bit of a Memorial Day, Fourth of July, or Labor Day twist on them:  Red and Blue M&Ms!!!

Step One:  Lay out pretzels on a cookie sheet.  Put one Hershey Kiss on each pretzel.  Put into the oven at 170 degrees for about 3 minutes.


Step Two:  Take out of the oven and place the M&Ms right in the middle of the Hershey Kiss.  Push the kiss into the melted chocolate so that it is “smushed.”


Step Three:  Let cool, I usually put mine in the fridge to set.  


Then EAT!!!


Have you ever made these delicious bites?  What type of pretzels did you use?  Please share!
  

Thursday, January 31, 2019

Garden Update: Garlic


I have never planted garlic in the ground before, I have only tinkered around with planting scraps for the garlic greens (see how-to post here).  I don’t currently have a lot of vegetable garden space, as my landscape is more formal with flowers, bushes, and trees.  This is one of the reasons why I prefer to garden in containers.  Garlic needs about 10 months (that’s right 10 MONTHS!) in soil in order to grow, and this would just not do in containers.  After much debate, I decided that I would try to find a small place in my landscape that I could plant some garlic! 

I found a small space in my backyard between some Sedum and a Peony that wouldn’t be completely upset by filling it with some garlic and got started!    


The process started in September.  I bought garlic cloves from two grocery stores, one clove was a hard neck variety and one was from a soft neck variety.  I separated the cloves, each of these will be planted like a seed, in total I had about 30.  At this point, I amended my soil with some fresh compost and  made three channels/rows to set the clove.  After each clove was placed a few inches from each other, I covered them with soil and watered them in really well and made sure the soil was kept moist every couple of weeks.

The garlic had sprouted significantly by November due to the warm weather.  I was a bit worried about the 6 to 8 inches of green that had already grown, so I decided to cover the area with some extra straw I had on hand just to cover them a bit during the first frosts.  


As you can see in this picture that I took just a few weeks ago (almost halfway for the garlic’s growing season), they are doing just fine above ground.  I can’t wait to see how they are doing below ground. 

I’m interested to see how they look in my landscape through-out the spring/ early summer months (harvest should be sometime in late June!)  As a trial, if these garlic plants don’t look “weird” in my landscape, I might add more vegetables in and around my formal landscape to test out the soil vs container gardening later in the year.

I’ll keep you all updated on the progress!  Have you ever sacrificed part of your landscape for vegetable plants?  Have you ever grown garlic before?  Please answer in the comments, I’d love to know!

Sunday, January 28, 2018

African Violet Blooms

When I first started gardening my main focus was not on flowers, I really just wanted fresh herbs and a fun hobby, however few months ago I found a beautiful african Vvolet that I just needed to add to my ever growing collection.  It originally had several beautiful purple blooms and some buds just ready to open. 

After a couple weeks, I had cut off the dead flowers and was left with only three sad looking flowers.  I was so upset that I must have done something wrong; as I am a newbie gardener and african violets are known to be bit needy.  Luckily, I am located near two (yes TWO), African Violet Societies - The Cincinnati African Violet Society and the African Violet Society of Dayton and they put on a Spring Show and Sale this past April.  They were available for questions and I sure asked them!  I specifically asked about african violet's blooms and what I should do to help my african violet grow! 

They gave me two main tips:

1.  Light - make sure that the plant is getting enough light, but not too much.  Put the plant in a new spot for two weeks and watch the leaves, if they look too dark or too light, pick a new spot.

2. Time - african violets need time to rest after they bloom, wait about 6 to 8 weeks for new blooms before worrying or changing location too much.

I took their advice.  I made sure the plant was in a nice window sill and waited.  At the start of the 8th week I noticed tiny buds forming! It worked!  After a few more days I now have a bud about to bloom and several more growing!


Monday, March 12, 2018

Basic Pesto Recipe


I’m going to start off by saying I love pesto, it is so fresh tasting!  I also enjoy making my own pesto, but sometimes, finding the right recipe can be hard.  They can include ingredients like basil, arugula, chickpeas, walnuts, and countless different cheeses to just name a few.  I'm never one to just stick to a rigid recipe, I like a bit of fluidity to use what I have on hand.  Sometimes I have arugula from my spring garden, other times I just have basil from my aerogarden.  Sometimes I have parmesan cheese, but if I run I usually have mozzarella on hand.  

I like to be able to keep my recipes open to variation to let me be creative with flavors, but also keep me from going to the grocery store because I just used the last bit of parmesan for something else. 


In order to let myself have this creativity with a pesto recipe, I decided to lump some of the same categories together and find a theme.  Basil, herbs, and arugula are leafy greens.  Walnuts, chick peas, and pecans are nuts.  Parmesan and mozzarella are cheeses.  Olive oil is just, well olive oil.  Flavor enhancers like garlic and pepper are "optional".

Basic Pesto Recipe: 
2 cups leafy greens
1/2 cup cheese
1/2 cup olive oil
1/4 cup nuts 
1 tbl “optional”


 Put all the items in your food processor and process until everything is fully mixed and smooth.  Taste test to make sure you have a pesto you are happy with before putting in a food safe container in the fridge. 

For an easy party appetizer, sprinkle cheese on pesto and serve with pita chips or crackers!  Or add some to a chicken for quick Italian Night dinner.


Do you experiment with recipes?  Or do you stick with the exact ingredients?  How do you enjoy pesto?  Comment below, I would love to know!

Thursday, March 15, 2018

How to Wash and Dry Makeup Brushes


This type of “How To” isn’t the usual thing I post about, but when I learned a neat trick on how to care for my makeup brushes, I just had to share!  I’m in the middle of some spring cleaning and took a few minutes to clean my makeup brushes and thought this might inspire you to do the same!

Makeup brushes can be rather dirty, even if you don’t use them on a regular basis!  Think about it, they get loaded up with makeup, oils from your skin, and since we usually store them upright, dust can land on the tops of the brush and get into the bristles.  If not washed and dried properly they can become a host to bacteria!  YUCK!


To actually clean your makeup brushes, you need to use soap to clean the bristles.  I use Bare Minerals “Well-Cared For” Brush Conditioning Shampoo, but you can use any brand or even dawn dish soap will work.  For real hair bristles you will want to find a conditioning soap or add a bit of olive oil to your dish soap to condition the bristles or else they will dry out.  If you aren’t sure if you have real hair bristles or not, err on the side of caution and condition your brushes, it won’t hurt faux bristles.


Put a drop or too of soap in a bowl or glass of water.  I use the glass that I store my brushes in for this task.  Next, put the bristle part of your brushes into the water and wash them like you would a small paint brush.  Use your fingers to make sure the interior bristles are cleaned.  Once the brush is “clean’, put the brush end under running water until it runs clean.  When no evidence of makeup or soap is present, it is time to dry!

The trick I wanted to share is part of the drying process.  I used to just place my clean brushes flat on a towel and waited a day or so until they were completely dry.  The trick is to roll another towel up and place it under the drying towel to elevate the handles of the brush so that any excess water will run down the brush rather than stay in it.  Wait until the brushes are completely dry before putting them away upright.  


I hope you found this trick as interesting as I did!  How often do you clean your make up brushes?  Do you have a favorite soap you use?


Related Posts Plugin for WordPress, Blogger...