Showing posts with label Flowers. Show all posts

Thursday, March 14, 2019

The Steps to a More Perfect Container Garden


Last year I showed you how I started my seedlings indoors.  My process worked, but as I have been upgrading my container garden, I decided a needed I a little bit more preparation this year in order to have a smoother spring/summer.  Usually I plant seedlings and put those seedlings into pots when they are big enough to go outside, however I never really thought through the space or number of pots that I had on hand.  So, I ended up putting a plant in either too small or too big of a pot, not having enough tomato cages, or not having the space to put them altogether.  This year, I decided to decide what my garden is going to look like BEFORE I start my seedlings so that I don’t waste time or effort later when it comes time to put them outside.

Last spring, the Mr. Fix-it husband upgraded my watering system from hoses and 360 degree sprayers that mostly just got the ground wet, to a fantastic built in piping system that allows me to have rows of container plants on my deck!  This is perfect because from where our kitchen is, I get to look out at my garden each day, as well as have easy access to the veggies for a fresh salsa or salad.  Below is a picture of what my “garden” ended up being organized last year:


I really enjoyed this set up last year, so I decided I wanted to do the same thing this year.  But first, I had to decide what I want to grow.  I had a few plants last year that I still have in the freezer that I don’t need anymore of (lookin’ at you jalapeno pepper plant) and some new ones I wanted to try. 


I started this process by writing down a list of the plants I knew I wanted to grow (tomatoes, bell peppers, eggplant, and herbs), then looked through my seedbox to find the seeds I already had on hand, and then looked through several seed catalogs to find new plants that I hadn’t grown before.  This process took most of January.  I took my time with this process because, everything was frozen and I really enjoyed looking at all the plant catalogs!  This process shouldn’t be rushed, and I wanted to take  to think about what I wanted to harvest in the future. 


Part of the process of looking at my own seeds included building my own seed storage box.  While searching for my seeds, I realized I had them stashed in all sorts of places and I wanted one container to call my seed box.  I shopped in catalogs as well as online for a box that I liked, but I couldn’t find anything in the shape or price range I wanted, so I decided to use my new wood working hobby to make my own.  (Let me know in the comments if you’d like to see the process in a post!)


After I had settled on a list of plants and purchased seeds for the items I didn’t already own, I decided to stay organized and write this information down.  (I know, sounds simple, right?)  I have not been very good at keeping a garden journal so I don’t have a good sense of what time of year we normally have our last real frost.  There are several websites with rules of thumb, so I decided to use that date until I had a better understanding from my “future” garden journals.  My area’s average last frost date is April 15th.  This date is important because most seed packets reference a “start you seeds” date based on the last frost for the year.  I made a list of each item, how many weeks before or after the frost date they should be planted and made an excel formula to tell me when I need to start the seeds (yes, I’m an excel nerd).  Now I know exactly when to start the seeds for each item instead of looking at each of the seed packets each weekend and doing to math to decide if I need to start some or not. 


Once I had the seedling start date, I needed to decide how many seedlings to start!  In order to do that, I need to know how many mature plants I want.  I started to list in my same spreadsheet the quantity of mature plants.  This would be another helpful piece of information to keep in a garden journal, for example, do four tomato plants produce the quantity of tomatoes I need, or should I plant five to keep up?  Or were eight eggplants too much for one year and I should cut back to six the next, etc.  I had to guess this year based on what I remember from last year and picked out how many I wanted of each.  I then categorized each item by what type of pot they would go into, and used a count formula to add up the quantity of each type of pot.  This way, I already know many of each kind of pot I need.  Lucky for me, I have twenty of my five gallon vegetable pots and I want exactly twenty vegetable plants (don’t you just love it when a plan comes together)?


Here is an idea of the pots that I use:
  • Vegetable Pots:  mix of different five gallon pots are the perfect size for one plant (tomatoes, bell peppers, eggplants, etc).
  • Small Pots:  mix of one to two gallon pots for smaller herb or lettuce plants
  • Rectangular Pots:  foot long rectangular plants for onions (see post here).
  • Trough:  very large 150 gallon trough on sale that I am going to try and use for large crops, and perhaps potatoes in the future
  • Grill:  an old grill that I converted into a planter which is the perfect standing height for a planter and works well for small herb plants like basil, rosemary, and cilantro.     
  • Decorative:  pretty pots I have collected over the years that I use for flowers


Once I had my full list of plants, quantities, and pots, I decided to map out how the container garden would look, much like my 2018 view.  This is really helpful because, now I don’t have to think about where I’m going to put each plant when it comes time to place them outside in a couple of months!  I already did all the work!


Now to get started on those seedlings!

How do you decide what to plant?  Do you keep a garden journal?  I want to know!

Thursday, February 14, 2019

African Violets: Re-potting and Propagation


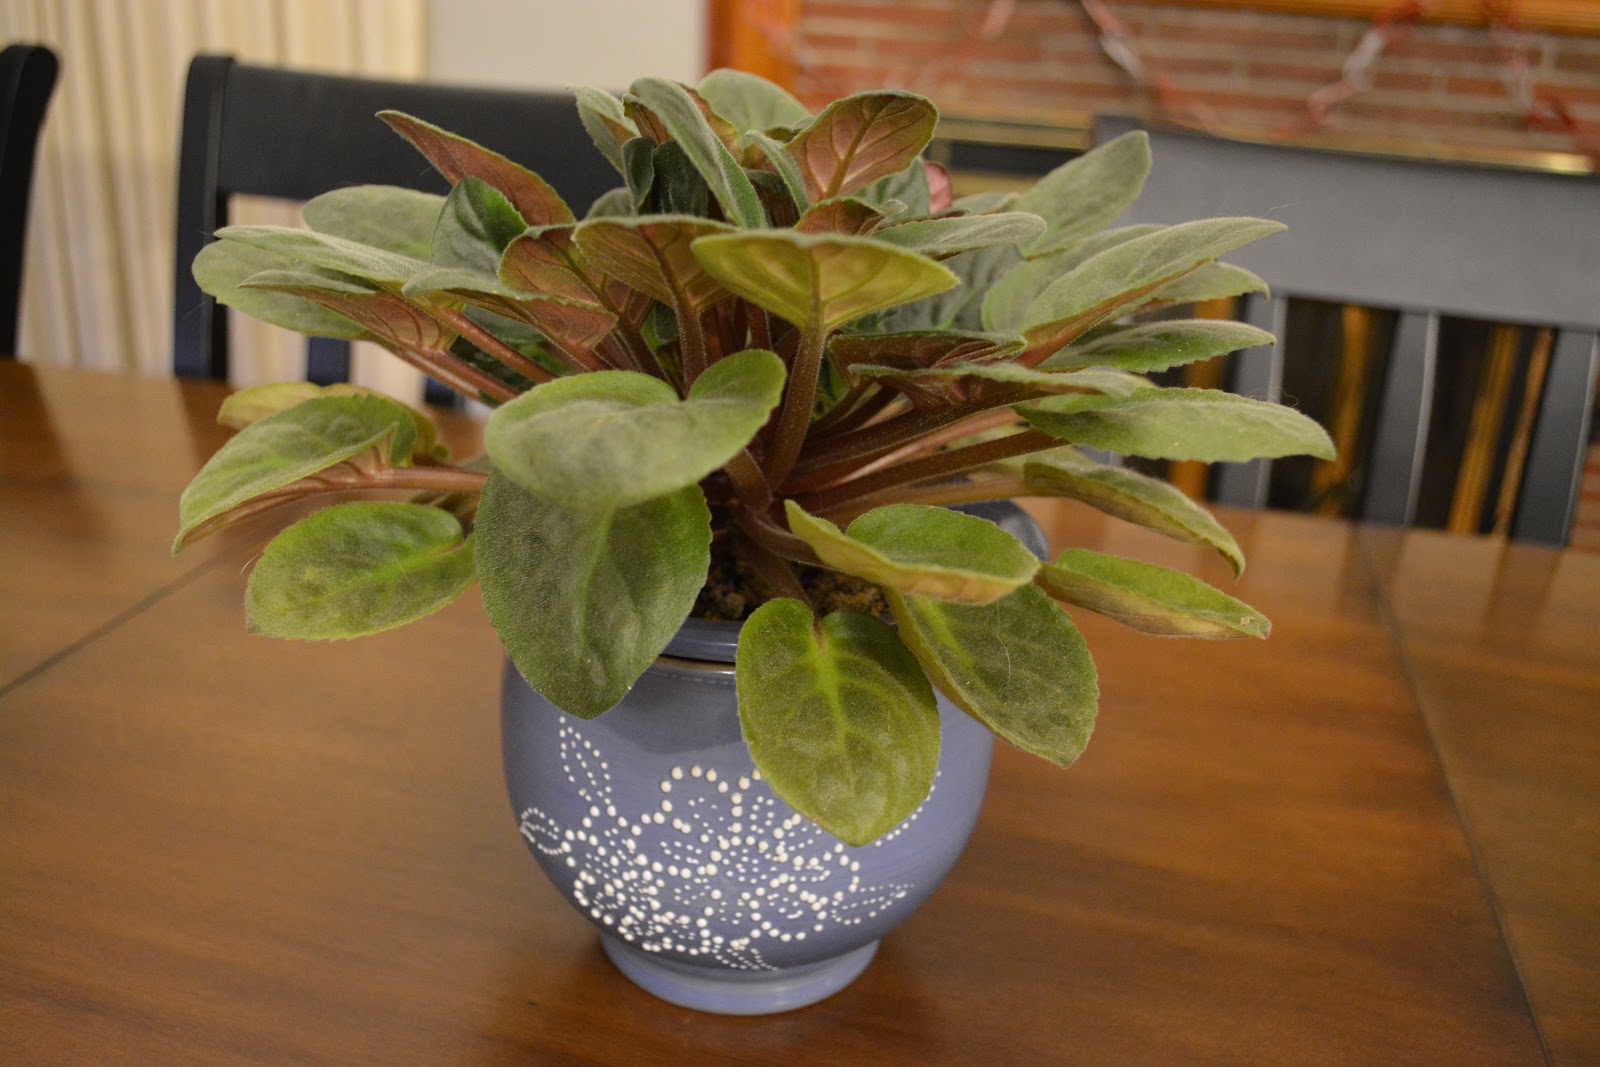
About this time last year, I wrote a post with a few tips on how to care for an African Violet and how to encourage it to bloom.  Since then, my plant has bloomed two more times!  It has also grown significantly and has nearly outgrown its pot.  As the plant grows taller, more and more of the stem becomes exposed making the plant top heavy.  


Not sure what to do, I visited my local garden center.  While perusing the store, looking for good deals on house plants, I asked one of the kind employees what to do about my African Violet!  She told me that in order to help an overgrown African Violet, all I needed to do was to repot it and the exposed stem would grow it’s own roots.  I decided to document this process to share how to repot an overgrown African Violet, but also to try my hand at African Violet propagation.  Let’s see what happens!

To start, I cleared space to repot my plant.  Due to the crazy low temperatures and rain, I had to do this project inside instead of outside!   To contain any spilled dirt or water, I use a boot tray.  I get mine really cheap from Aldi and they work perfect to keep my space clean while indoor “gardening”. 


I then took a look at my plant.  Yes, I just LOOKED at it.  One of the coolest things about an African Violet is that it grows uniformly in a circle, so I wanted to make sure that I kept that shape.  Much of the stem was already exposed due to leaves falling off throughout the year, so I took note of which leaves I could take off and the plant would still look balanced.  I didn’t want the plant to be lopsided! 

Next, I popped several of the leaves off.  First, I removed the leaves that were yellowing.  Then I popped off the green leaves that would balance out the plant since I just removed the yellowing ones.  Then I popped a few off to make the plant the size I wanted it to be.  In all, I popped off about 15 leaves.  These will be used for propagation, so I took off a few more than I might have done otherwise. 


By “popping” off, I mean that I carefully wiggled the leaf at the base until it “popped” off from the step.  If you try this method and the leave rips off, that’s okay.  You can use it for propagation, and pop the rest of the stem off at the base.


Next, I planted the main plant back into it’s pot with fresh soil.  I made sure to clean the pot out completely to give it a fresh start.  I have used the Espoma African Violet soil in the past, but I purchased the Miracle-Gro African Violet soil from my local garden center because it is what they had in inventory.  My review of these soils is below.


I first put some soil in the pot, placed my plant, and then filled in the rest of the pot with soil, fairly easy.


I purchased a second African Violet on clearance while at the garden center this weekend, so I potted it up the exact same way.  I have no idea what color the flowers will be, so I’m excited for this one to bloom.


Propagation:

You can propagate African Violets from cuttings.  This means, you can grow a second plant from a piece of the original plant, much like succulents.  You don’t have to gather seeds and re-grow a plant like a pepper, for example. 


To propagate, take healthy looking leaves from an African Violet plant and take off the stems to about an inch from the leaf. 


Next, fill pots full of moist African Violet soil.  


Make sure the soil is moist and not completely dry!  I used my watering can from Gardner's Supply to water my soil first.


Then, place the leave stem into the soil at a 25 – 30 degree angle.  The little hairs on the stem will turn into roots and a new plant will grow from that leaf.


I put a tooth pick in one pot to mark that pot as having the “new” African Violet leaf, and not the my already known purple flowered plant.  Any time I do an “experiment” I try to label and record as much as possible so I can learn what worked and what didn’t.      


Espoma Vs Miracle-Gro Soil


I didn’t think that the two soils would be very different because they are both made for African Violets, but boy was I wrong.  The Miracle Grow soil was more mulchy, while the Espoma soil is more loamy.  I personally like working with the Espoma soil better.  I also like that the Espoma has a zipper to close the bag, vs having to just fold it over – it is much more tidy! 

Currently, I’m noticing that the Miracle-Gro soil holds onto moisture a bit differently and my plants are reacting as if there is too much water in the pot.  I re-potted and propagated using the Miracle Grow soil, but after a week I might report them again with the Espoma soil.  I’ll give them all a week to settle into their new pots and see what happens.  Most plants are fairly resilient, so they should bounce back in either case. 


Make sure to follow Classy Event Organizer on Instagram and Facebook for updates on these African Violets.  Leave a comment if you have any African Violets and how you’ve repotted them or propagated them.  I’d love to hear about your experiences!!

Sunday, February 18, 2018

DIY: Bulb Vase


I love making homemade gifts for no reason at all!  You don’t have to wait for a holiday to celebrate the everyday!  When I told you about accidently “forcing” my tulip bulbs, I took the opportunity to share the touch of spring with family.  Finding single bulb vases can be tricky if they aren’t in season, so I decided to make my own.  

I took a few items from around my house to make bulb vases and wanted to share to hopefully spark some spring time creativity of your own!   


For a single bulb vase, I needed something that was transparent in order to see the bulb grow, as well as hold enough water for roots to grow, but not so much that the bulb would root.


While looking in my craft room stash of containers, I found a Nacho Cheese Container (cleaned of course) to use as a bulb vase.  In order to sit the bulb above a water line, I decided to use vase filler stones.


I’m so excited to share these with my friends and I can’t wait to see what they look like when they bloom!


For updates on this DIY project, as well as other updates, follow Classy Event Organizer on Facebook and Instagram!


Related Posts Plugin for WordPress, Blogger...